> ## Documentation Index
> Fetch the complete documentation index at: https://docs.converlens.com/llms.txt
> Use this file to discover all available pages before exploring further.
# Quota Settings
Quotas allow you to keep track of how many respondents meet a condition in your survey. The purpose of a quota is to make sure that you gather only the exact amount of data required for your study. For example, you could use a quota to keep track of how many people from each State or Territory in Australia have taken your survey to make sure you have gathered a balanced sample.
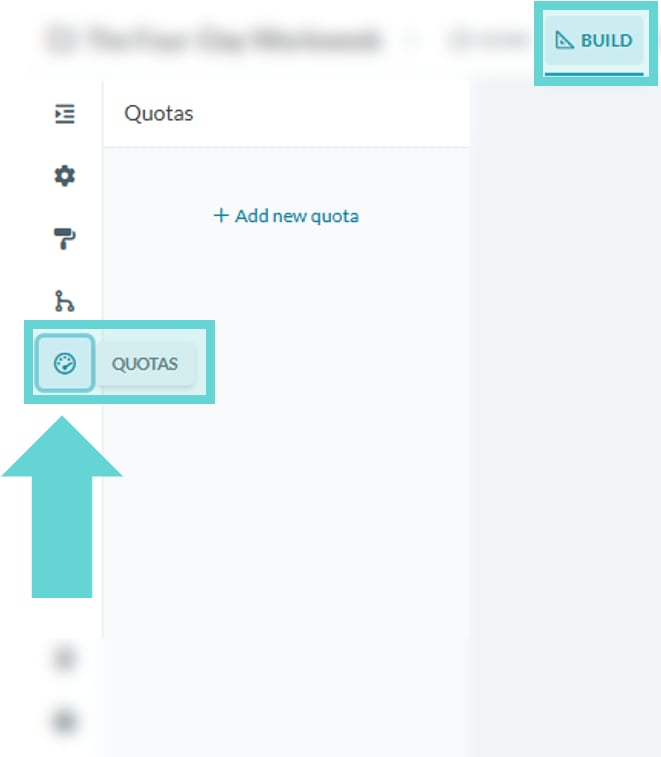
To open Quotas, click on the Quotas icon from the left menu in the Build Tab:
# Add a new Quota
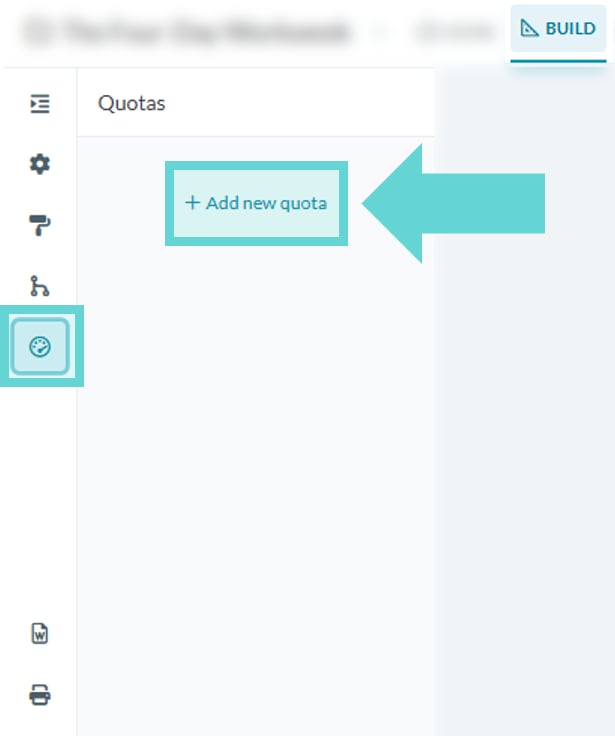
To add a new quota, click +Add new quota in the quota settings panel
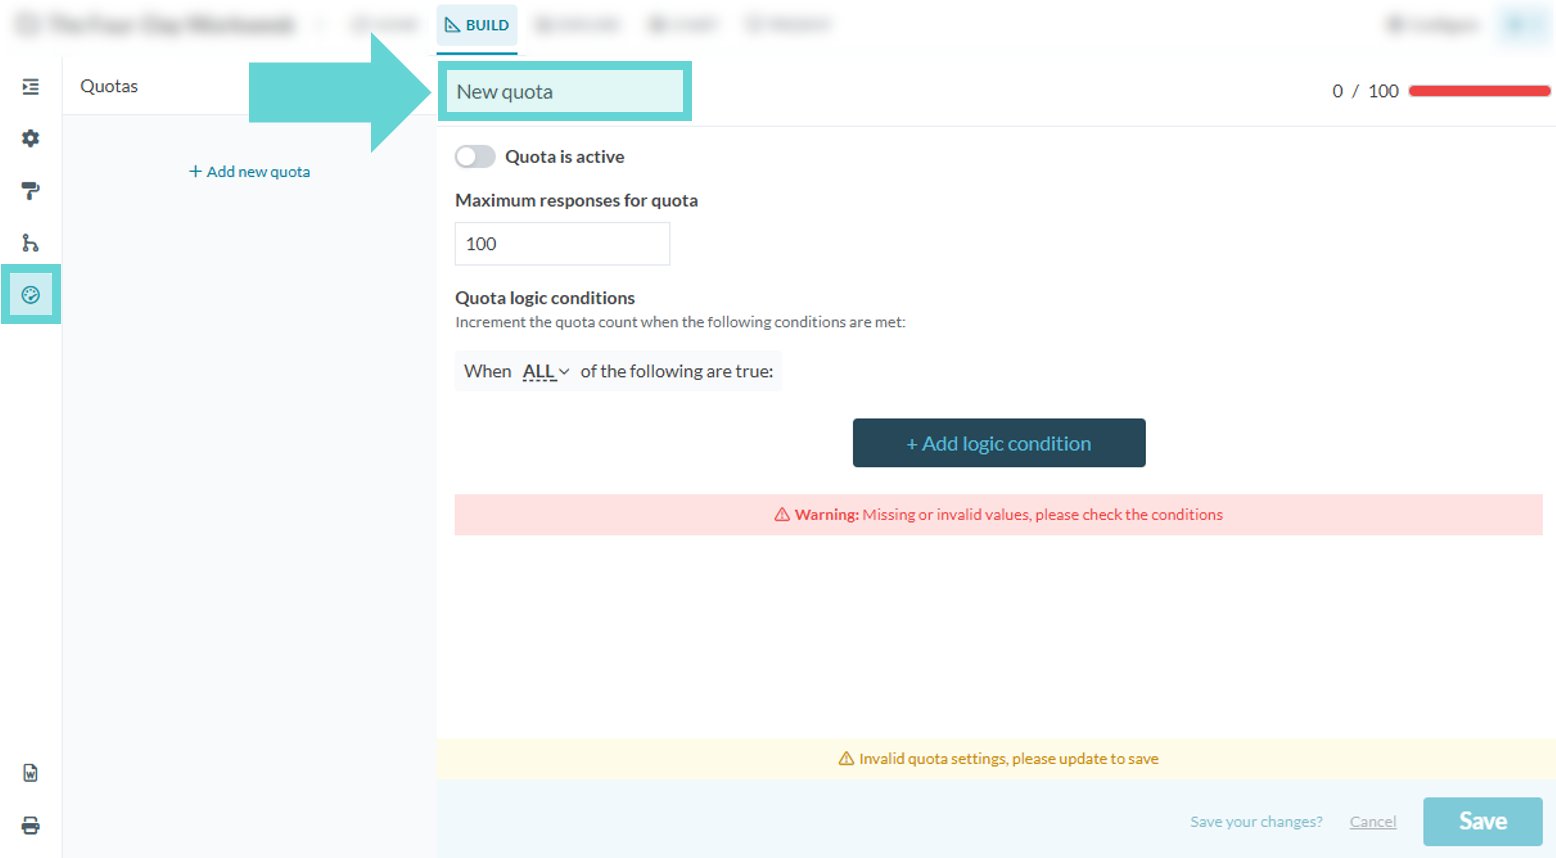
## Quota title
Type in the text box to edit the quota title
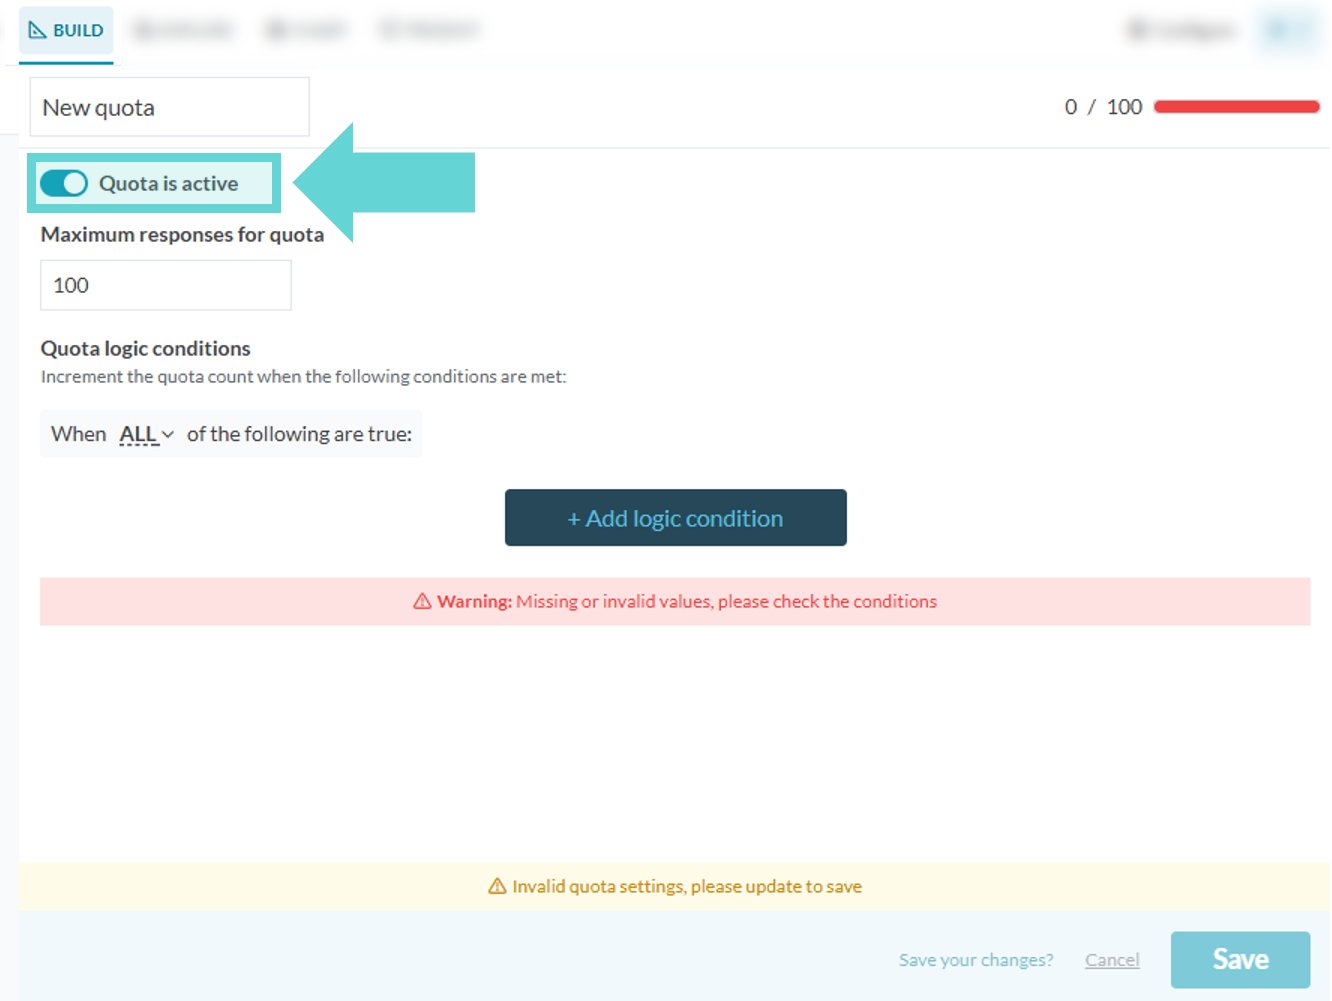
## Quota is active toggle
Toggle on/off to enable/disable the quota for this data space (survey). If the slider is positioned to the left and appears grey, the quota is disabled. If the slider is positioned to the right and appears blue, the quota is enabled.
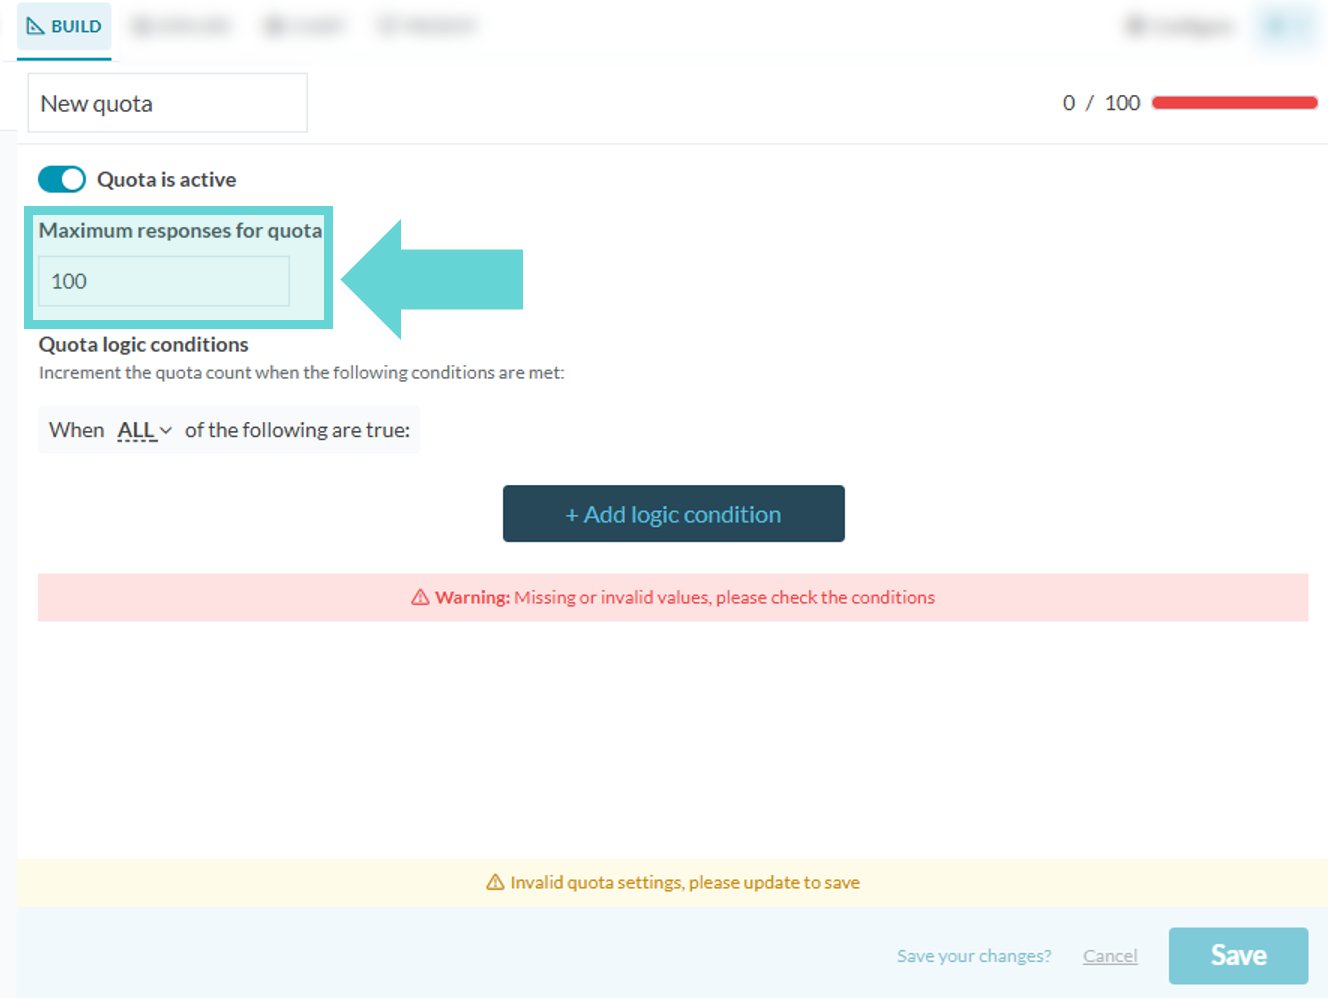
## Maximum responses for quota
The quota target is the maximum number of respondents you want to take your survey who fulfill the quota conditions.
To set the quota target, click the number beneath “Maximum responses for quota”. Type in the quota target (number value) for the conditions you are setting for that particular quota.
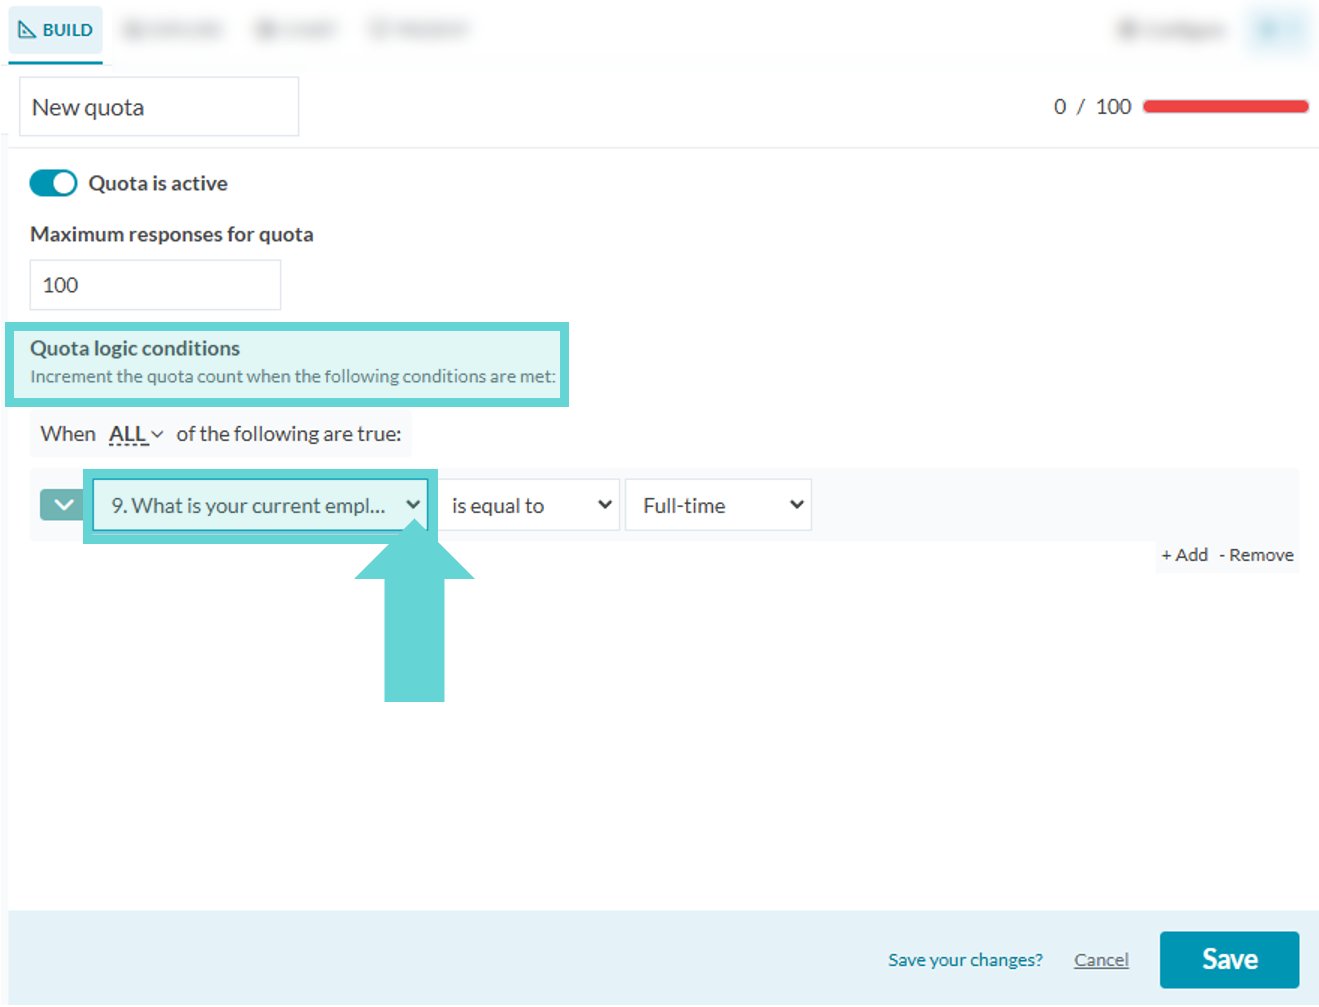
# Quota logic conditions
The next step in setting up a quota is to specify conditions that must be true for a respondent to increment the quota. Your quota will be incremented when a respondent meets the condition(s) you have set *and* finishes the survey.
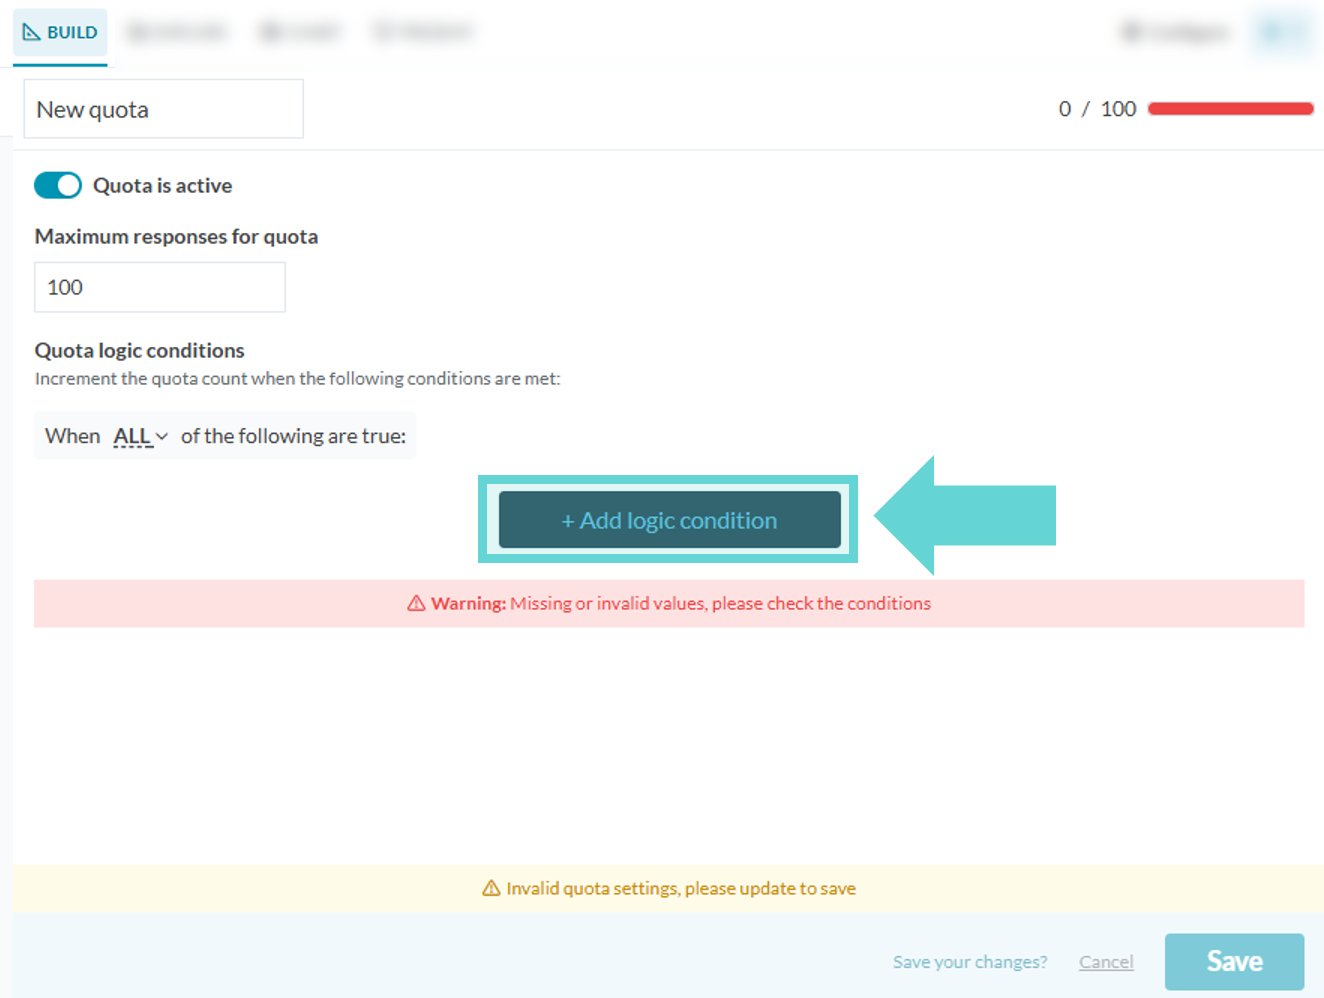
## Add logic condition
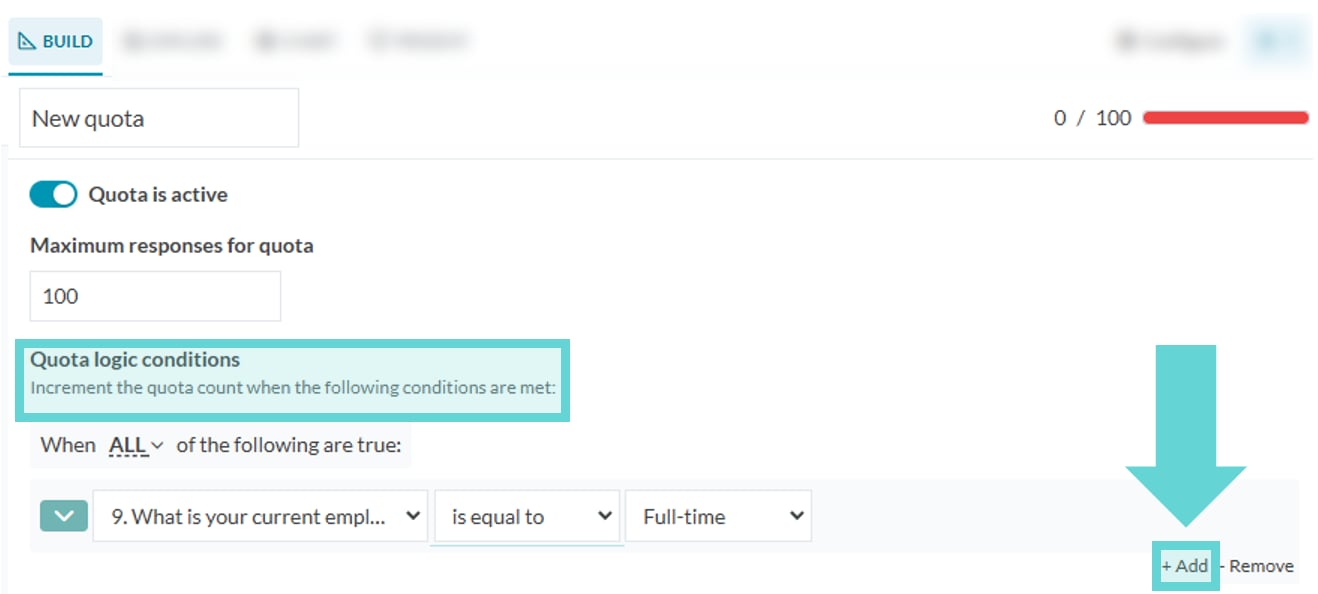
 To add a logic condition click +Add logic condition.
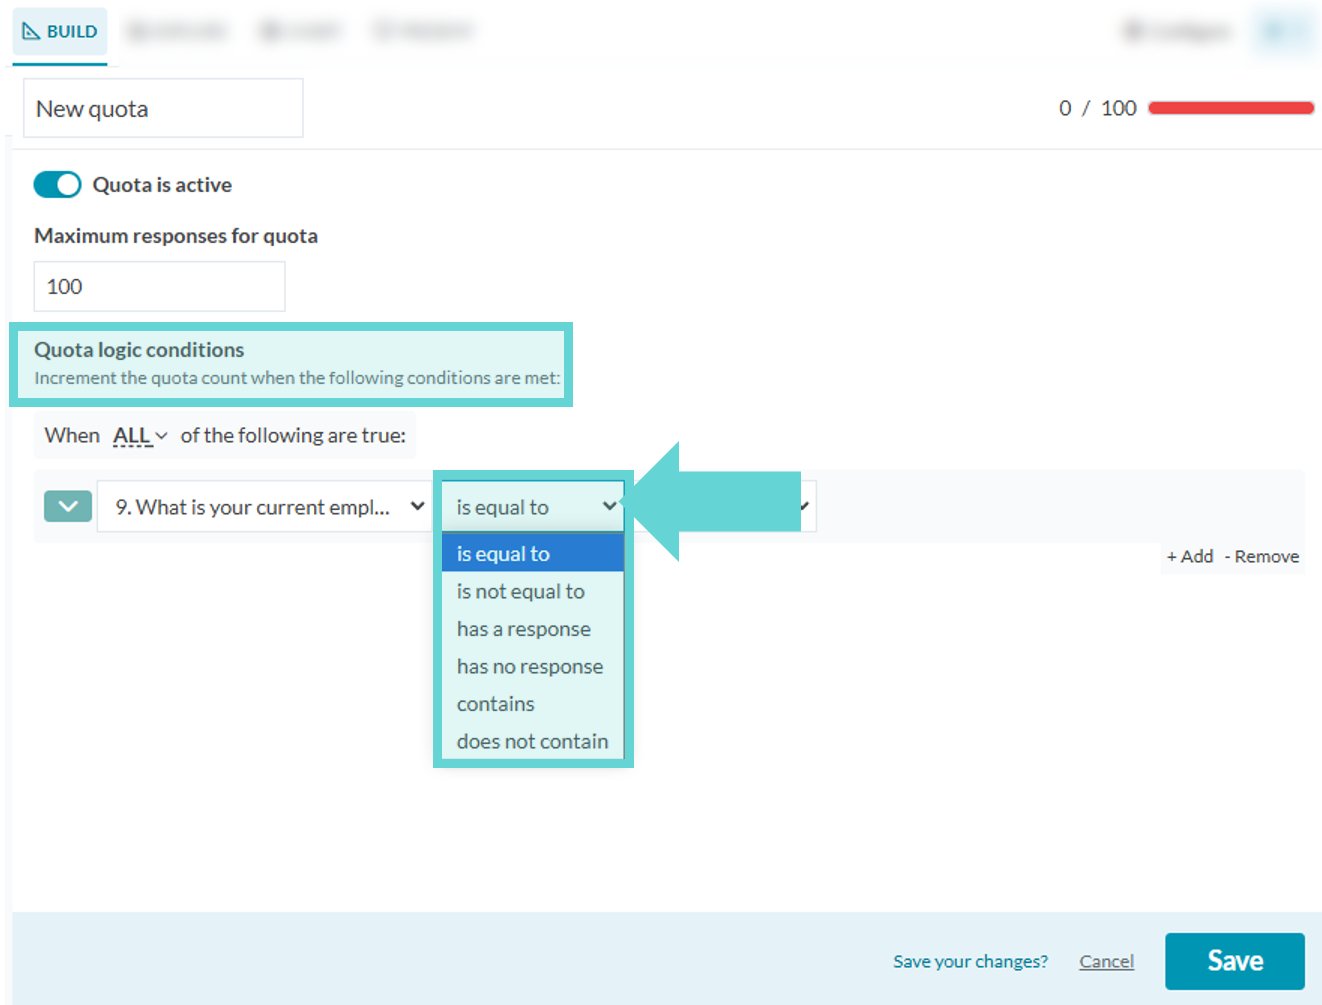
Select the block (question) to set the condition from the first dropdown menu:
Then fill out the filter menus that follow with your specific criteria. The available options will depend on the question type you select.
**Tip:** Pre-defined answer block types (such as multiple choice or drop-down questions) are preferred over text block types for quota logic conditions to ensure conditions are accurately met. Pre-defined answer types ensure uniform responses, prevent issues with capturing all possible variations and spelling mistakes, and simplify the quota logic, making it straightforward and reliable. To ensure your quota conditions are met accurately and efficiently, converting free text questions to multiple choice or drop-down formats wherever possible is recommended.
If required, click the +Add button to add another condition.
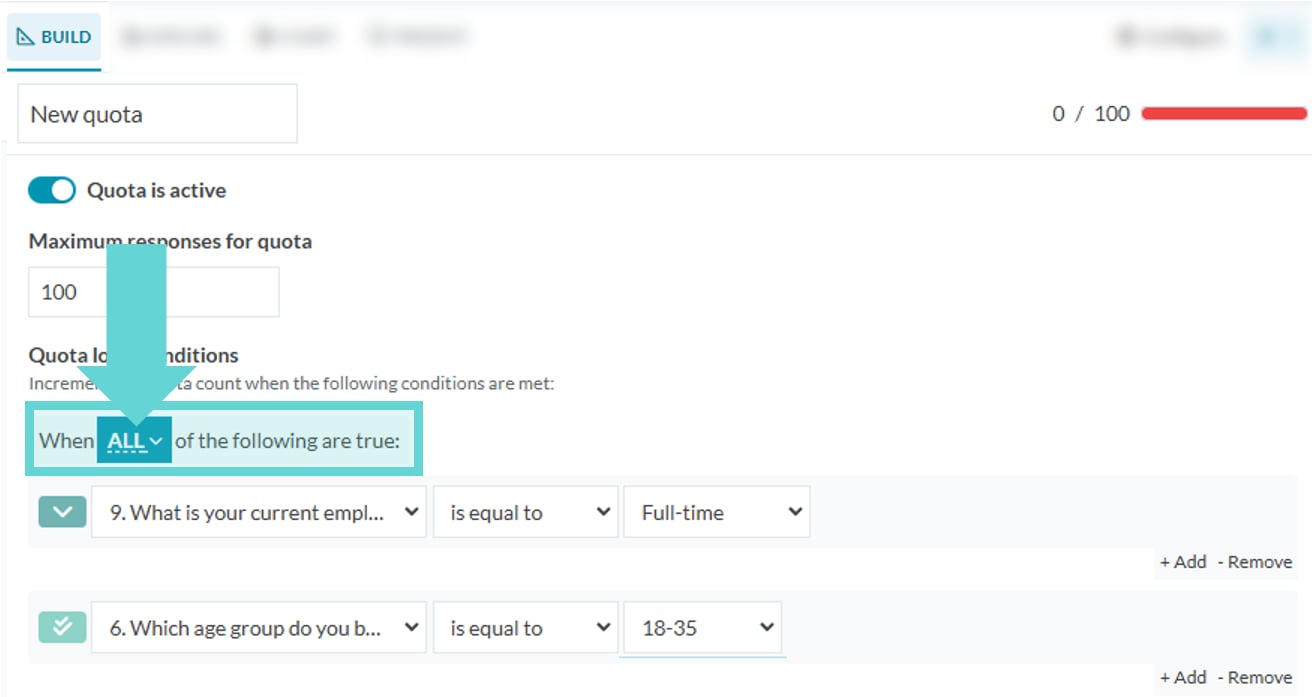
### Any/All
Choose between Any/All to decide how conditions should be connected.
Click on the dropdown arrow next to ANY/ALL to switch between selecting Any/All for the quota logic conditions. The "any" and "all" options in the quota tool are used to define how the conditions you set should be combined to determine if a respondent meets the criteria for the quota.
* **Any (OR logic):** A respondent is included if they meet at least one condition.
* If you select "any," it means that a respondent only needs to meet **one or more** of the conditions you specify to be included in the quota. This uses an "OR" logic. For example, if you set the following conditions:
1. The respondent works full-time.
2. The respondent is aged between 18-35.
3. The respondent lives in Sydney.
* With "any" selected, a respondent who meets **any** one of these conditions (works full-time, or is aged 18-35, or lives in Sydney) will be included in the quota.
* **All (AND logic):** A respondent is included only if they meet every condition.
* If you select "all," it means that a respondent must meet **every single** condition you specify to be included in the quota. This uses an "AND" logic. For example, with the same conditions:
1. The respondent works full-time.
2. The respondent is aged between 18-35.
3. The respondent lives in Sydney.
* With "all" selected, only respondents who meet **all** these conditions simultaneously (they work full-time **and** are aged 18-35 **and** live in Sydney) will be included in the quota.
Choosing between "any" and "all" depends on whether you want a broader or more specific group of respondents for your quota.
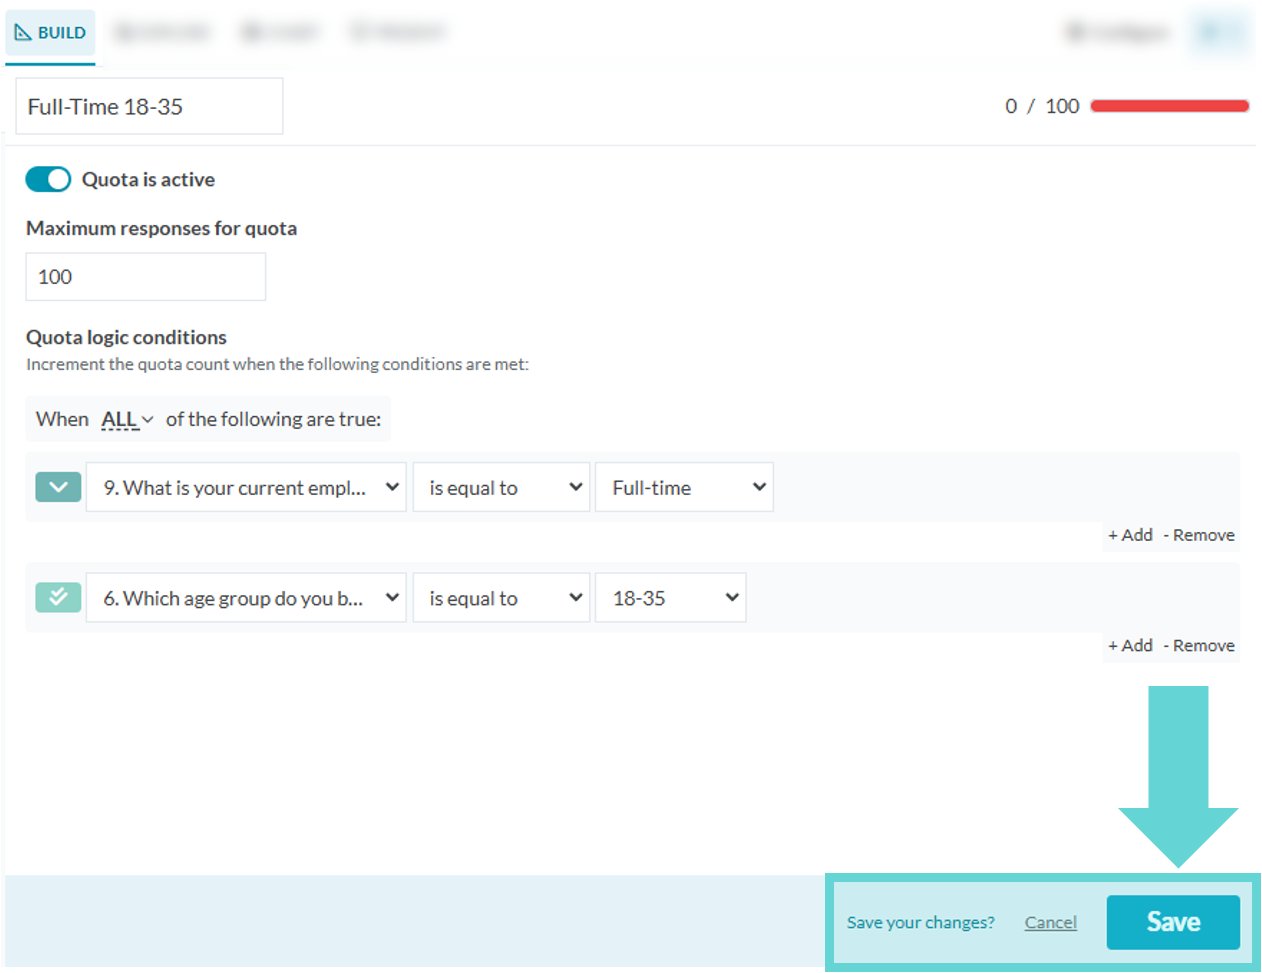
# Save changes
When you are happy with your quota settings click Save in the bottom right corner. If the quota toggle is active, the quota will be applied to the survey immediately.
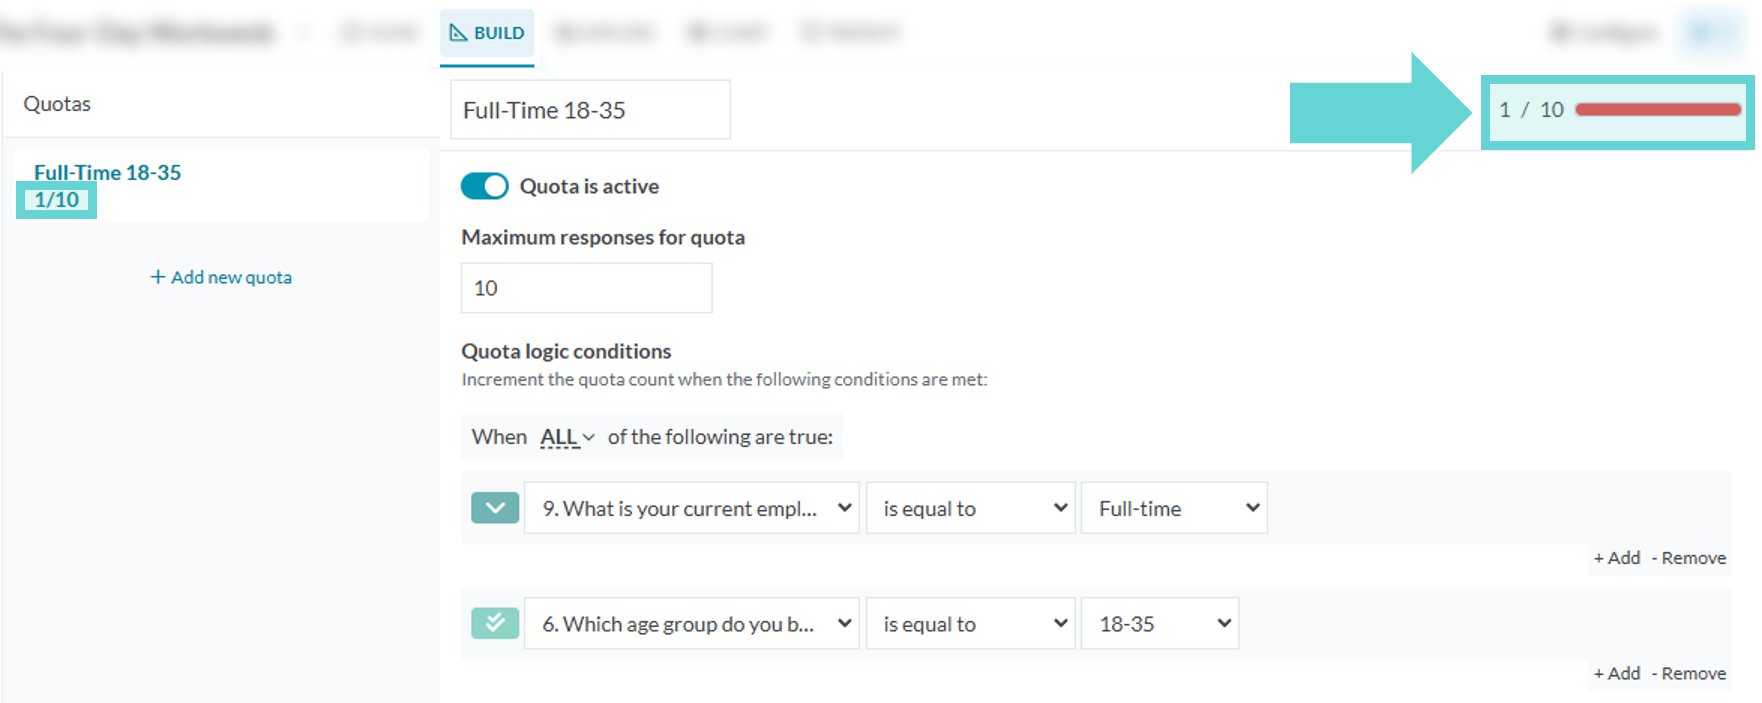
# Quota count
Next to every quota and underneath the quota title, you’ll see a pair of numbers – for example, 0/100. The number on the left of the slash (e.g., 0) is the quota count. The number on the right (e.g., 100) is the quota target. The quota count is the number that indicates how many respondents have taken your survey and met the conditions for the quota. This number automatically changes as new respondents take your survey and meet the specified conditions.
# Delete a quota
To add a logic condition click +Add logic condition.
Select the block (question) to set the condition from the first dropdown menu:
Then fill out the filter menus that follow with your specific criteria. The available options will depend on the question type you select.
**Tip:** Pre-defined answer block types (such as multiple choice or drop-down questions) are preferred over text block types for quota logic conditions to ensure conditions are accurately met. Pre-defined answer types ensure uniform responses, prevent issues with capturing all possible variations and spelling mistakes, and simplify the quota logic, making it straightforward and reliable. To ensure your quota conditions are met accurately and efficiently, converting free text questions to multiple choice or drop-down formats wherever possible is recommended.
If required, click the +Add button to add another condition.
### Any/All
Choose between Any/All to decide how conditions should be connected.
Click on the dropdown arrow next to ANY/ALL to switch between selecting Any/All for the quota logic conditions. The "any" and "all" options in the quota tool are used to define how the conditions you set should be combined to determine if a respondent meets the criteria for the quota.
* **Any (OR logic):** A respondent is included if they meet at least one condition.
* If you select "any," it means that a respondent only needs to meet **one or more** of the conditions you specify to be included in the quota. This uses an "OR" logic. For example, if you set the following conditions:
1. The respondent works full-time.
2. The respondent is aged between 18-35.
3. The respondent lives in Sydney.
* With "any" selected, a respondent who meets **any** one of these conditions (works full-time, or is aged 18-35, or lives in Sydney) will be included in the quota.
* **All (AND logic):** A respondent is included only if they meet every condition.
* If you select "all," it means that a respondent must meet **every single** condition you specify to be included in the quota. This uses an "AND" logic. For example, with the same conditions:
1. The respondent works full-time.
2. The respondent is aged between 18-35.
3. The respondent lives in Sydney.
* With "all" selected, only respondents who meet **all** these conditions simultaneously (they work full-time **and** are aged 18-35 **and** live in Sydney) will be included in the quota.
Choosing between "any" and "all" depends on whether you want a broader or more specific group of respondents for your quota.
# Save changes
When you are happy with your quota settings click Save in the bottom right corner. If the quota toggle is active, the quota will be applied to the survey immediately.
# Quota count
Next to every quota and underneath the quota title, you’ll see a pair of numbers – for example, 0/100. The number on the left of the slash (e.g., 0) is the quota count. The number on the right (e.g., 100) is the quota target. The quota count is the number that indicates how many respondents have taken your survey and met the conditions for the quota. This number automatically changes as new respondents take your survey and meet the specified conditions.
# Delete a quota
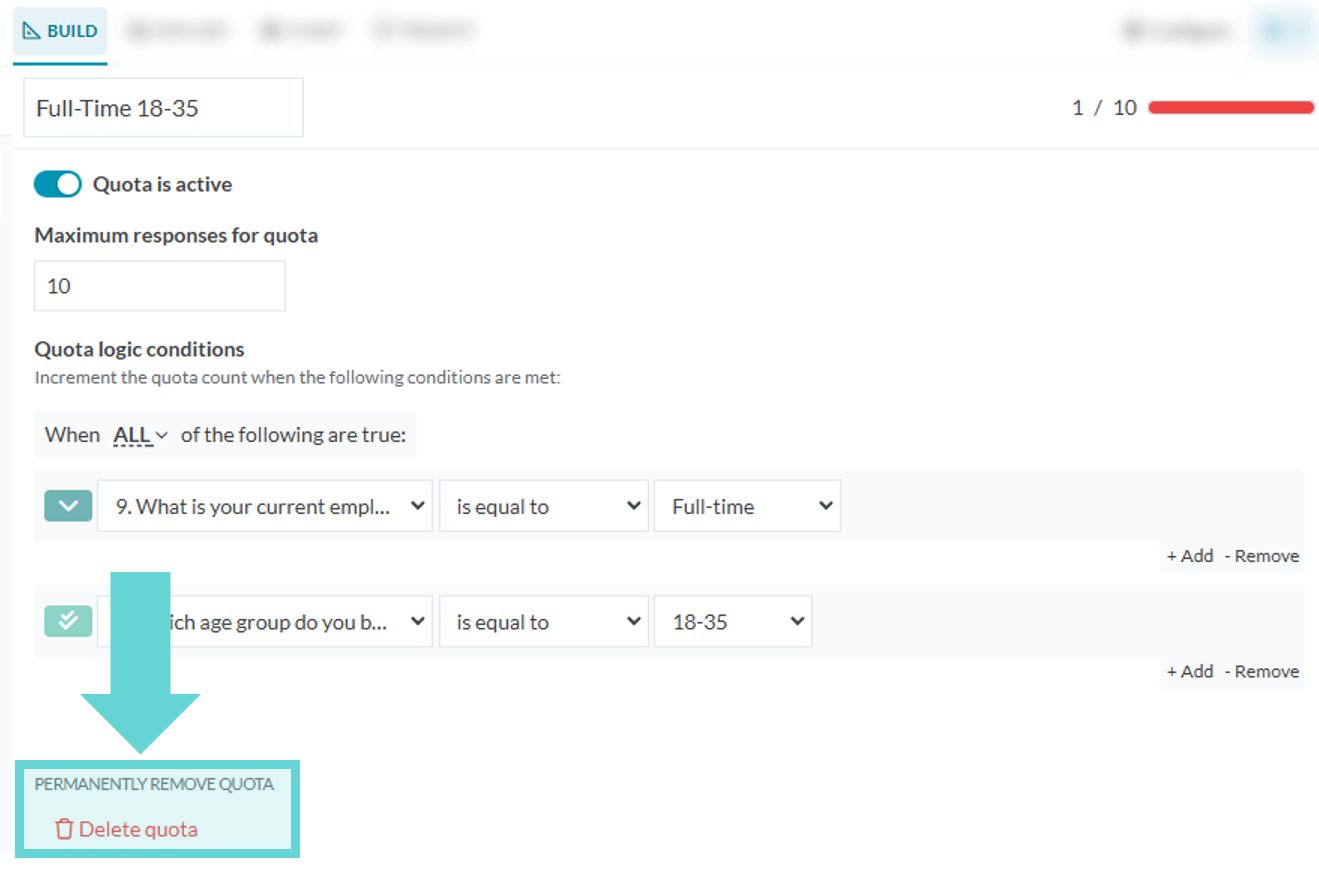 To delete a quota, select **Delete quota** under “Permanently remove quota”. Converlens will open a popup confirmation. Click **OK** and the quota will be deleted.