- Group contacts into Lists for targeted communication.
- Customise contact fields to store relevant information.
- Apply labels to categorise contacts without adding them to lists.
- Search, filter, and view contacts to quickly find the right people.
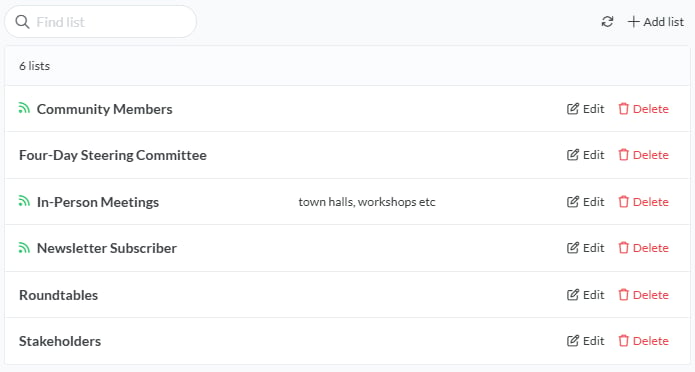
Lists: Creating & Managing Groups
Lists allow you to organise contacts into groups for easier management and targeted communication. Use Lists to create and manage groupings of your contacts.- Find List: Use the search box to quickly locate a specific list by name.
- Refresh: Click to refresh the list of available contact groups.
- + Add List: Select this option to create a new contact list.
Create a new List
Click + Add List to create a new list from your Contacts.- List Name: Enter a name for your list in the text box
- Description (optional): Provide a short description for the list, if needed.
- Colour: Click the colour box to open the colour picker, where you can slide to choose a colour, or manually enter a hex code to set a colour for the List. Click the shuffle button to select one randomly.
- Public List: Toggle on/off to enable or disable contacts managing their own subscription to this list.
- Cancel: Exit the menu without saving changes.
- Create: Finalise and save your new list.
Fields: Customise Contact Information
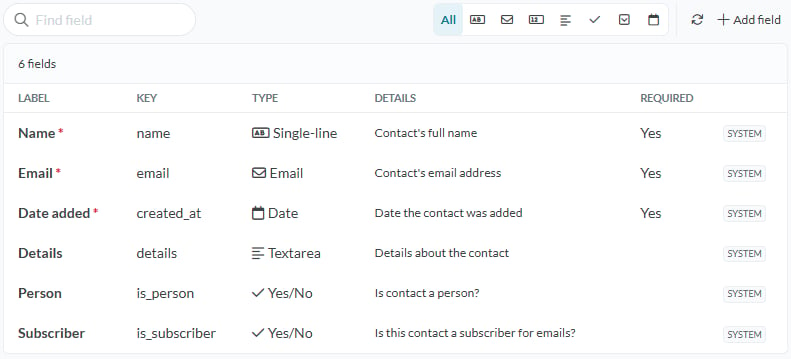
The Fields section allows you to define what information is stored for each contact, similar to setting up column headings in a spreadsheet. These fields define the information you want to include for each contact. The landing view displays all fields:- System Fields: Default fields set by the system, which are required and cannot be edited.
- User-Created Fields: Fields added by users that can be customised. These fields include a 3-dot menu where you can:
- Edit: Modify the field details.
- Hide: Temporarily remove the field from view.
- Delete: Permanently remove the field.
- Find Field: Use the search box to quickly locate a specific field.
- Field Type Filters: Click an icon to filter and display only fields of a specific type (e.g., “Email” to see all email-type fields).
- Refresh: Update the field view to reflect recent changes.
- + Add Field: Create a new custom field.
Adding a New Field
To add a custom field, click + Add Field and enter the following details:- Label: Enter the name of the field.
- Key: Specify a unique key for the field.
- Field is Required: Toggle this on to make the field mandatory when adding or editing a contact.
- Field Type: Choose the type of data the field will store:
- Single Line Text
- Long text
- Number
- Yes/No
- Dropdown
- Date
- Details: Provide brief details or a description of the field.
- Save Field: Click to save and add the field to your contact layout.
Labels: Tag Contacts
Labels act as “tags” you can apply to your contacts for quick categorisation and reference without grouping them into formal lists. They offer a flexible way to organise and identify contacts. Label Management Options:- Find Label: Search for a specific label.
- Refresh: Update the label view.
- + Add Label: Create a new label.
- Edit: Modify a label’s name, description, or colour.
- Delete: Remove the label permanently.
Adding a New Label
When adding a new label, the following options are available:- Label Preview: Displays a preview of how the label will appear.
- Label Name: Enter the name of the label.
- Description: Optionally, add a short description of the label.
- Colour Select: Choose a colour for the label for easy visual identification.
- Cancel: Exit the menu without saving changes.
- Create Label: Save and add the new label.
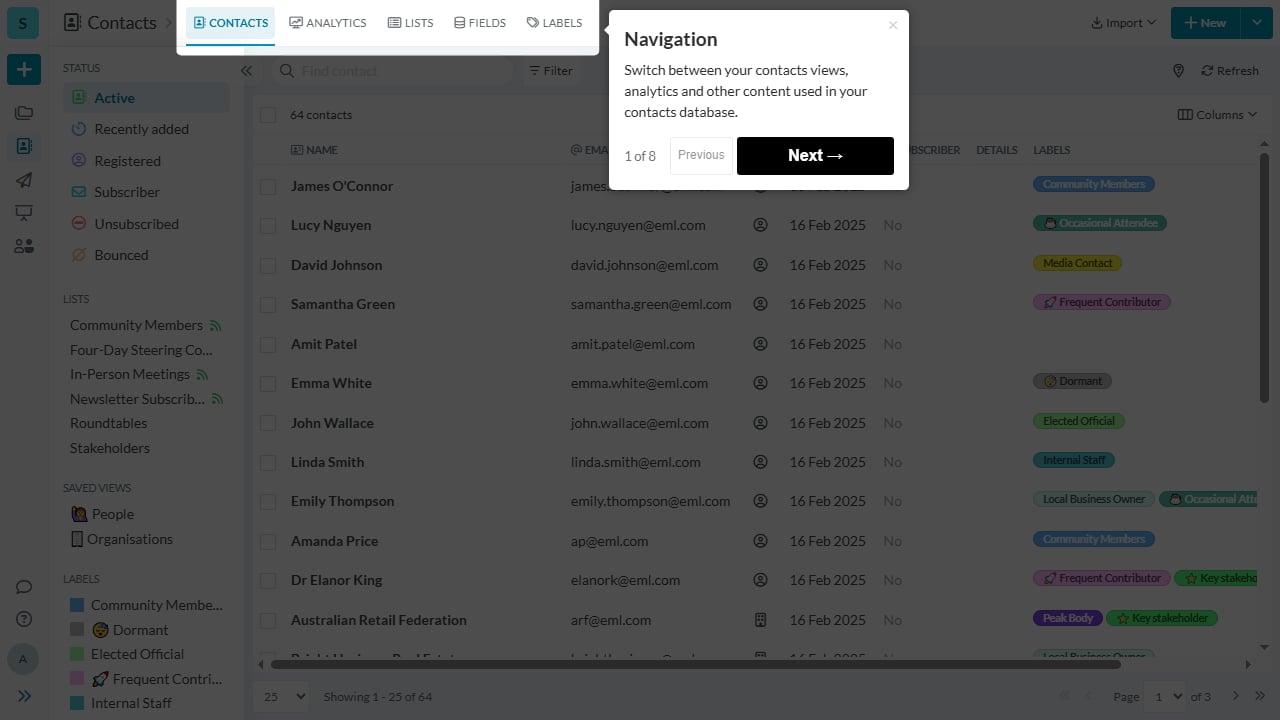
Searching, Filtering & Viewing Contacts
Contacts Sidebar & Statuses
The Contacts view allows you to view and manage contacts by status, lists, labels, filters and search.Sidebar Categories
- Status: The Overview view provides a quick way to view contacts based on status. Common statuses include:
- Active contacts: Displays contacts that are currently active.
- New (30 days): Shows contacts added in the last 30 days.
- Subscribers: Lists contacts who are subscribed to receive communications.
- Registered: Lists contacts marked as registered members.
- Suppressed: Shows contacts who have unsubscribed, bounced or complained.
- Lists: Displays all contact groups in your workspace. Click a list to view its members.
- Labels: Displays all tags applied to contacts. Click a label to filter contacts by tag.
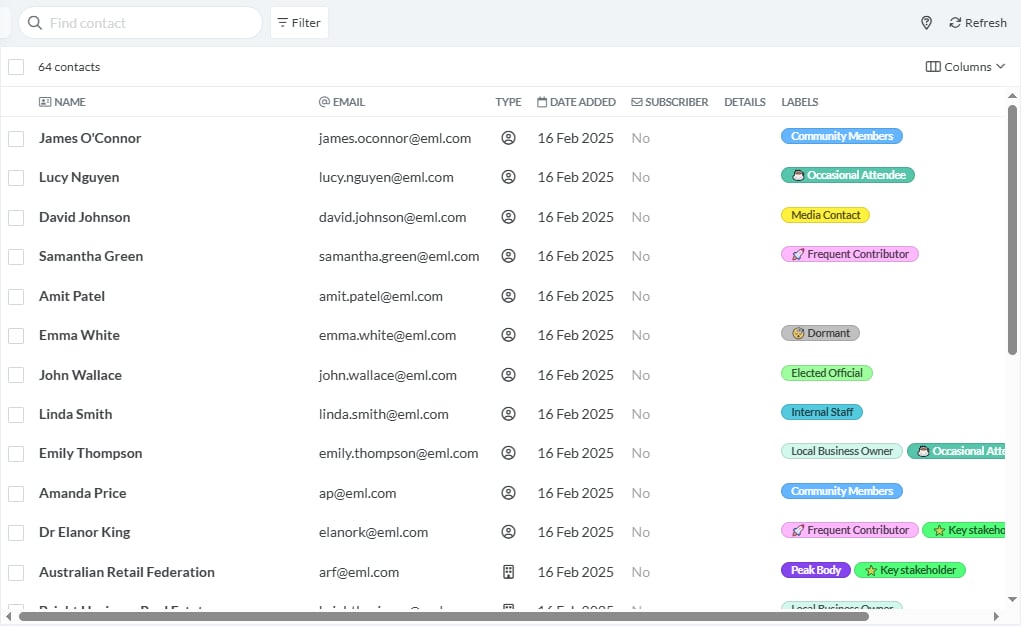
Contact Stage
The Contact Stage is where you can view all your contacts. From this area, you can perform various actions to manage and filter your contact list.Find contact (Search)
Filtering Contacts
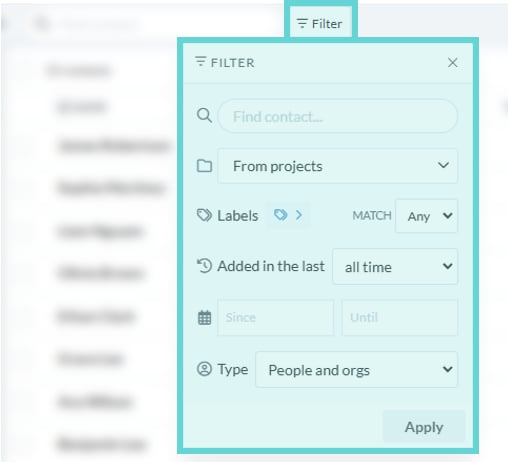
Click the Filter button to apply filters to narrow down your contact list based on specific criteria:- From Projects: Filter contacts based on the projects they are associated with.
- Labels (Match Any/All): Filter by labels, toggle between filtering by Any or All labels.
- Added in the last [time period]: Select a time frame to filter contacts based on when they were added.
- Since / Until: Filter contacts by a specific date range.
- Type: Filter by contact type.
- People and Orgs: Display both people and organisations.
- Only People: Show only individual contacts.
- Only Organisations: Show only organisation contacts.
Additional Contact Management Options
Refresh
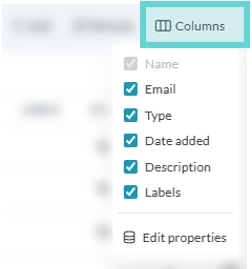
Click to refresh the contact list view and apply any changes made.Columns
Click the Columns button to open a dropdown of applicable fields and adjust the columns to display only specific fields.- Edit properties: Click to open the Fields view and edit the fields or create new ones.
Tour