Save and Exit
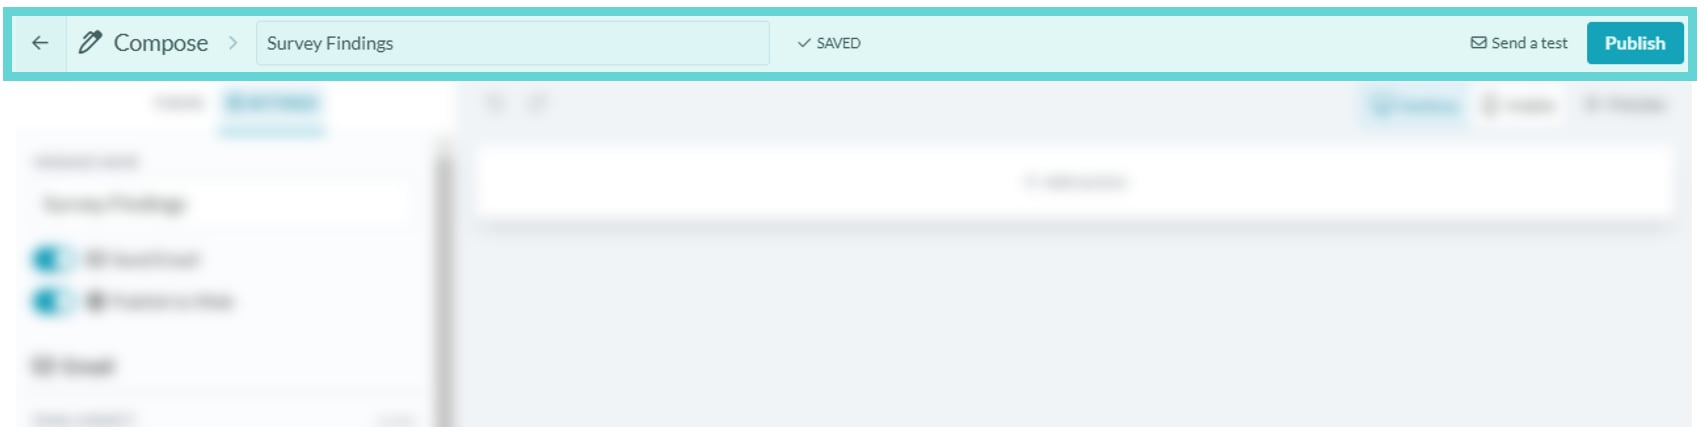
To save and exit back to the Messages inbox, click the ← arrow in the top left corner.Message Name
Type in the text box to edit the Message Name. This name is for internal use only and won’t be visible to recipients.Send a test
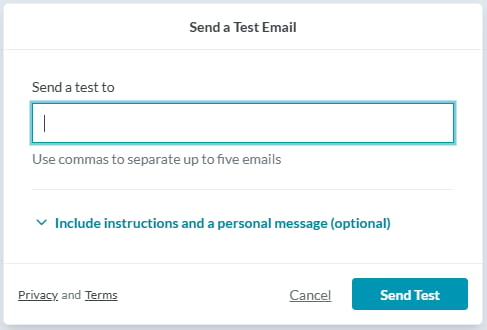
Click on Send a test to open the send a test message menu:- Send a test to: Enter the email address to direct the test message to. Use commas to enter up to 5 email addresses.
- Include instructions and a personal message: Click on the dropdown to enter a precursor message to appear with the test email.
- Cancel: Click Cancel to exit out of the Send a Test Email menu. No email will be sent.
- Send Test: Click Send Test to send your current message to the identified test email recipients.
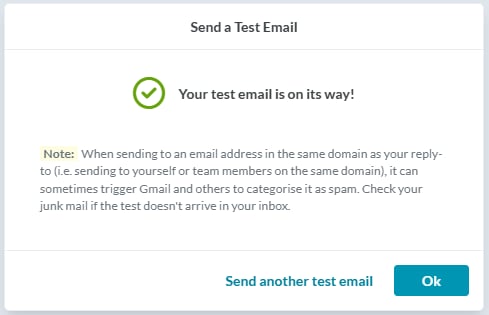
- Confirmation Message: A confirmation message will appear when a test email is sent. Click Ok to exit or Send another test email to send additional tests.
Publish
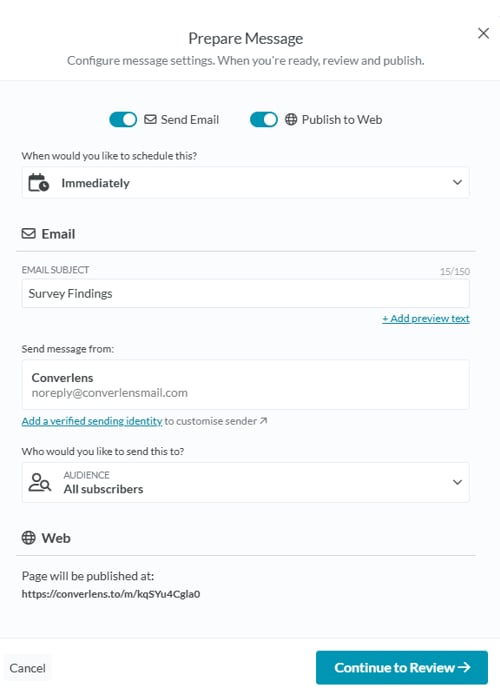
Click on Publish when you are ready to send and/or publish your message. This opens the Publish Menu:Email Settings
To enable email settings, ensure the Send Email toggle is ON.- Publish to Web: Activate this toggle to make your message available on a unique web page. This is useful for sharing your content online beyond email recipients.
- Send Email: Enable this toggle to send your message as an email broadcast. Once toggled on, you can configure additional email settings like subject lines and recipient lists.
- Scheduling: Click to set a publish date and time, or select Immediately to send the message as soon as it is published.
- Email Subject: Set the email subject line that will appear in recipients’ inboxes.
- Add preview text: Set a short summary that appears next to the subject line in recipients’ inboxes.
- Send Message from: Choose the sender identity for this message. Workspace admins can add and verify sending identities from Messages Configure.
- Campaign tracking: Optionally append UTM parameters to email links.
- Send to: Select your recipients using contact filters, lists and labels.
Web Settings
To publish the message as a webpage, ensure the Publish to Web toggle is ON. The public page will use the message’s generated web link.Continue to Review
When you are happy with the Email and Web publishing settings, click Continue to review to go to the next page.Cancel
Click Cancel if you would like to close out of the Publish menuReview Message
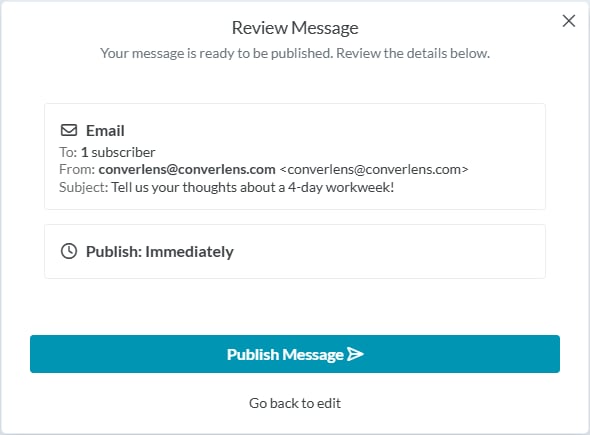
Review the message details prior to publishing.Publish Message
Click to publish the message. Once the message has been published, Converlens will return to Messages. The message will be sent immediately or scheduled, depending on your publish settings. Messages can also have a Published label when they are available on the web.Go back to edit